Google has been communicating clearly for 3 years now about the transition to Https, it would favor sites that follow this “new standard” in organic results…
But first of all, what is this “https”?
It is a secure protocol for encrypting the site’s data that travels to the server. It prevents the recovery by a third party, of data that passes through via wifi for example
More of an incentive than a tangible reality, we have seen for a few months that half of the sites on the front page have migrated… What is sure is that it will mention in the results the unsecured sites.

Unsecured sites will be marked with red
I’ve been thinking about making a standardized migration offer for a long time, but I had to rationalize the different operations that I ensure the total security of this work considering the impact on the positions in the S.E.R.P.
In reality, if I was late in going, it’s because as a good SEO webmaster , prudence commanded me not to play the “sorcerer’s apprentice”, a reproach that I sometimes make to my clients when they are going to play in the sensitive files or configurations of their site. I needed a little experience before claiming to offer it to you 100% risk-free.
It’s now done, I’ve migrated my site and God knows I won’t take any risks with my visibility on the Web .
Anyway.
In a while, – but maybe much sooner 🙂 – every website will be secured by SSL/TLS certificate and that’s a very good thing. If you don’t make the move to Https now, you’re falling behind.

See the little green padlock at the top
4 reasons to migrate your website to Https:
- SSL/TLS security protects your website data and visitors. It encrypts data transferred over the web, such as form submissions and credit card transactions.
- SEO, Google regularly communicates on the push that this would bring to the positioning (not proven I have already said it).
- E-commerce —If you transact on your website, installing the certificate is no longer a negotiable option. E-commerce and membership sites.
- Affordable — In the past, security certificates were very expensive, but hosting providers faced with competition have put themselves within the reach of landlords and made it convenient and affordable. (Shop around anyway)
But here’s the deal…
Even if we have understood that “it’s just a game of redirecting” from the “old version” to the new one, it is legitimate to wonder where to start. And how to do it without endangering or even ruining the SEO work done… In particular hard-won positions.
It is indeed a new site!
As the URL changes from http://mon-chouette-site-web.com to https:mon-chouette-site-web.com the web portal is identified by search engines as a new entity.
The proof is that when the certificate is installed and the work is poorly done, the two versions are displayed online in unhealthy competition, especially since their content is perfectly identical.
In addition, the https version will only be under the Google console and analytic watch when you have declared and validated this new property.
That’s why I’m offering you this tutorial on how to securely migrate your site to https, using a streamlined method, from purchasing the certificate from your hosting provider to indexing the new site by Google.
A tutorial for a tricky migration
Most owners don’t know how to approach the migration and in what order to operate and are scared (with good reason), because the implications of a failed migration can be costly and the risk of losing acquired positions is very real.
Prerequisites
Have on hand
- Your FTP and cPanel access codes to your site, check that you have access to both before you begin.
I take this opportunity to remind you that it is not a good idea to change the password of the cPanel, on the contrary it is better to have a nice long list of complex signs to decipher. - Your Google account codes in order to validate your work at the end of the operation.
- Software to access your FileZilla, Fetch or other server
- And Search and Replace DB software (but there are others)
Under WordPress many extensions that avoid the use of this software ( better search and replace) . If you make your backups with the “updraft plus” plugin, an advanced tools module will provide the same service more simply.
A back-up, or nothing
Start by making a complete backup (even if you can make do with the database) of the site via cPanel to ensure a return in case of crash.
Purchase of the security certificate
Certificates can be bought from hosting providers, there are all kinds of them and at any price.
This is the easiest step, you just need your bank card… The easiest way is to acquire this certificate from your hosting provider, they will set it up and activate it for you in a few hours, sometimes less than 30 minutes.
I recommend that you buy it yourself, so you will only have one invoice, only one service provider for these two independent products each year.
If you can buy this for 3 years, it will be less trouble, the certificate must be revalidated every year and requires reinstallation
Indeed, from now on, the security certificate is the 3rd component of your online existence
- NDD
- Accommodation
- SSL/TLS
When I see my customers confusing the renewal of their Domain Name with that of their hosting, this advice should be taken seriously. Bundle services, pay only one bill per year.
Setting up an HSL manually
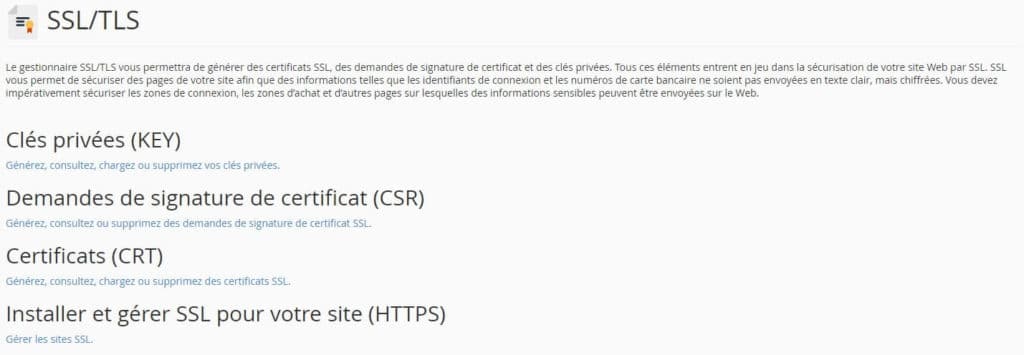
 If you acquire it from an independent service provider, you must go through the cPanel and go to the SECURITY » SSL/TLS tab to make the certificate signing request (CSR)
Panel/SECURITY
- Go to SSL/TLS/Certificate Signing Requests (CSR)

- Fill in the form and validate by pressing the Generated button
- This will generate the certificate signing (CSR)
- Use this certificate to buy your SSL
- Your SSL provider will provide you with a private key
- Go and install it in the section (Install and manage SSL for your site (HTTPS))
Whichever you choose, your certificate is now active.
You can check this by typing your darling URL with an S in front of the usual HTTP in a browser and see that it shows up. remove the s and you will see that “the old version is still there too) It is now a question of the cohabitation of your two sites not lasting too long.
Redirect search results to your site under Https
This operation will allow Internet users to land on your new site when they type a search result naturally indexed to the usual addresses.
Edit the file. HTAncis
You will add the redirect code in the htaccess of the site, this code allows you to guide all the URLs to their corresponding one in the new site. So there’s no need to write a tedious and cumbersome 301 file identifying each page address, articles and other types of content such as images.
Method 1: Stick to the top of the Htaccess
# Redirect to HTTPS
RewriteEngine On
RewriteCond % {HTTPS} off
RewriteRule (.*) https://%{HTTP_HOST}%{REQUEST_URI} [R, L]
Or method 2: Stick to the top of the Htaccess
# Redirect to HTTPS
RewriteCond %{SERVER_PORT} ^$80 [OR]
RewriteCond %{HTTPS} =off
RewriteRule ^(.*)$ https://mon-chouette-site-web.com/$1 [R=301, L]
If it does not use the www, redirect to the correct version
Always write in the htaccess:
# Redirect to the version without www
RewriteEngine on
RewriteCond % {HTTP_HOST} ^www\. my-owl-website\. com [NC]
RewriteRule ^(.*)$ https://mon-chouette-site-web.com/$1 [L,R=301]
Of course, replace my-nice-website\ with your NDD
To prevent your site from being a forest of redirects
Replace internal site URLs and hyperlinks
Now that your certificate is active and the redirects are done. You have to replace the internal addresses of the site, and the hyperlinks that participate in the mesh of your pages. This is even if redirects are active and people can browse your new baby.
Update all URLs from Http to Https.
- You will use the Search and Replace DB
utility software, its role is to fetch all the files in the database to replace them with the new ones with the S. - Download the script and unzip it to your computer;
- Then install it on the server at the root of your site via your FTP client software FileZilla
- Launch the app by typing in your browser’s address bar http://mon-chouette-site-web.com/Search-Replace-DB-master
Be careful, type the URL without the S in Https and without a slash/at the end.
The software in the browser offers several fields:
- Fill in both fields (The root URL without and with the S)
- First click on the button on dry run to do a test and be sure that it works correctly;
- If the test is OK, click on live run, in a few seconds the S will be added in 100% of your database;
- Finally, click on the delete me button to remove the script from the server.

Search and Replace DB
The Updraft Plus tool can replace this software

Verify migration
 The instructions are good for all CMSs, if you are on WordPress
Go to the WordPress admin to check the permalink settings of the site.
Menus: General Settings/Settings > : both fields indicate the modification of the internal URLs and it is not you who changed these fields.
We can also see it in Settings/permalinks (all the roots have changed)
If necessary, force SSL access for the admin
Normally, this should already be the case thanks to the redirects set up earlier, but you can insert this code into the wp-config.php, add the codes
Force HTTPS in administration
define (“FORCE_SSL_ADMIN”, true);
Thus, it will be impossible to access the WordPress dashboard in non-secure mode and all logins will be in HTTPS.
Update the robots.txt file
If you have put your sitemap.xml’s address in your robots.txt (a useless practice, but very common among Webmasters) you will see that the file is also up to date.
Bravo not-worst job
Test your SSL/TLS certificate
Do yourself a favor, test the installation of your Server Test SSL certificate.
If the test is not successful, take your copy step by step or reinstall your backup and call an HTTPS migration specialist 438 875 0503 for example
Hep hep hep, that’s not all
Update Google tools and validate https versions
Now head to your Google Webmaster tool account. ( Google Search Console)
Click on the gear at the top right of Google Search Console, select “Change of address” and let yourself be guided. Google Search Console
Add both versions of your website with www and without.
And adjust the basic settings in the process
- Select your preferred version (select the version you usually prefer [with www or without]
- Select the country that is your target
- Share access to the tool with your webmaster
- Post your new sitemap.xml
Update Google Analytics
Mention to Google Analytics that your site now uses Https,
menu Admin > Property > Setting the property and select https:// forthe Default URL field. Google Analytics.
Check that Analytics is linked to Search Console, Adwords, and Adsense if applicable
Other items to update
The address will have to be put in https:// wherever it is in http://
- Youtube account: change the associated domain name [screenshot below]
- Mailchimp campaigns [or other marketing tool]: change the url;
- Social networks: Facebook page, Twitter account, Linkedin, Pinterest, Google+,
- Email signature links, mail footer links,
Update as many inbound links as possible
All of your backlinks were direct links. The implemented redirect will lead the links to the right pages to their HTTPS equivalent, but these links will no longer be direct site A points to site B (your current site) which redirects to C (secure site)
In theory, you should contact the webmasters so that they update the link, not simple and time-consuming…
Do your best, without stress.
 Référencement-PME prends en charge les stratégies marketing des entreprises et PME dans la région de Montréal, pour sa plus grande fierté, depuis plus de 15 ans